
Readline is a tool you've probably used many times without even noticing - it's the default text interface for most terminals in *nix based operating systems! Any time you type stuff into a terminal prompt, you're using Readline!
A little known fact is that Readline comes configured out-of-the-box with some extremely useful commands and shortcuts. Today we will examine some of those shortcuts and do some customization of our own.
The Basics#
Readline's default function is to enter text. You do this simply by typing commands into the terminal:
1➜  ~ ls
2bin        Desktop  Music     projects
3Documents  org      Public    Templates
4Downloads  go	    Pictures  Videos
Whatever you type appears where the cursor was and the cursor advances to the right. If you mistype characters you can erase them with backspace. But this is not where Readline ends!
A technical note for MacOS users#
MacOS has a 'feature' where the alt/option key does not work as expected in the terminal. it will output funky characters instead of running the desired command. Depending on your terminal, you will need to set an option to enable the legacy keycodes to work correctly.
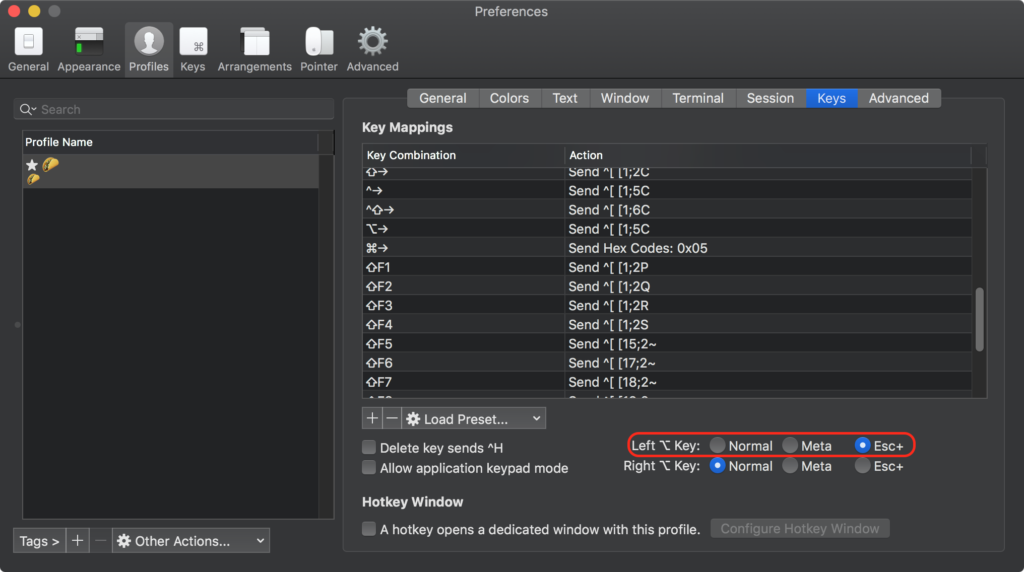
iTerm 2
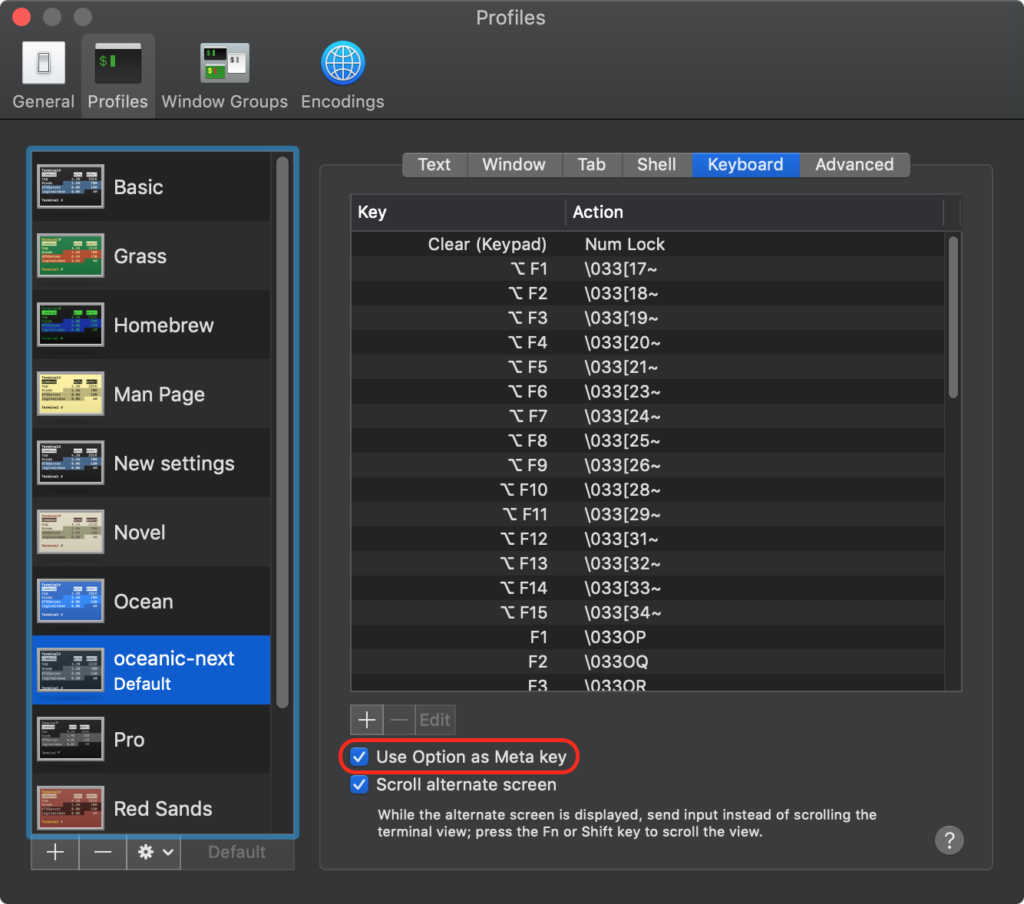
Terminal app (default MacOS terminal)
Movement Commands 🏃#
Readline comes with a handful of useful shortcuts for us to use. The table below lists each shortcut and what it does.
Shortcut
What it does
ctrl-a
Move to the start of the line
ctrl-e
Move to the end of the line
alt-f
Move forward one word
alt-b
Move backward one word
ctrl-f
Move forward one character
ctrl-b
Move backward one character
ctrl-d
delete the character under the cursor
Here are some examples of these commands in action
ctrl-a and ctrl-e
alt-b and alt-f
Killing Commands ✋#
Killing in the context of Readline means to delete that text and save it in a buffer for later use (very similar to the standard ctrl/cmd-x cut command other text editors have)
When you use a 'kill' command, Readline saves the 'killed' text in a 'kill-ring' (you can think of this as a circular array) Any number of consecutive kills are combined, so that when you yank it back, you get it all. The kill ring is also not line specific - the text that you killed on a previous line is available to be yanked back later, when you are typing another line.
Note: 'Cut' and 'Paste' are a more user friendly way to say 'kill' and 'yank'
If a command listed in the following table says that it 'kills' something, we know that means we can get it back later!
Command Shortcut
What it does
ctrl-k
kill the text from the current cursor position to the end of the line
alt-d
kill from the cursor to the end of the current word, or, if between words, to the end of the next word
alt-DEL
Kill from the cursor to the start of the current word, or, if between words, to the start of the previous word
ctrl-w
Kill from the cursor to the previous whitespace
ctrl-y
Yank the most recently killed text back into the buffer at the cursor
alt-y
rotate the kill-ring, and yank the new top to the buffer at the cursor. This will only work if your prior command was ctrl-y or alt-y
Searching for previous commands in history#
You probably already know you can use the history command to list commands you've typed in the past:
1➜  ~ history
21 ls
32 cd ~
But did you know you can search history easily with Readline?
press ctrl-r to search backwards in history, and ctrl-s to search forward.

search back in history
Readline configuration#
Readline comes configured out-of-the-box to use a set of Emacs-like keybinds as we've highlighted above. But what if we want to change those?
Readline is configurable through a .inputrc file – by convention it will look for this file in your home directory ~
➜ ~ touch .inputrcIf that file does not exist or cannot be read, the ultimate default is /etc/inputrc (we should not edit that file though!)
There are only a few basic constructs allowed in the Readline init file – The syntax is as follows:
- Blank lines are ignored
- Lines beginning with a
#are comments - Lines beginning with a
$indicate conditional constructs (see the Readline docs for specifics) - Other lines denote variables and key bindings
changing the configuration is done by setting specific variables in this file. Let's change readline to use vim keybinds!
1// in .inputrc
2
3set editing-mode vi
Now we need to add a line to our ~/.bash_profile or it's equivalent if we are using another shell such as ~/.zshrc
1echo "set -o vi" >> ~/.bash_profile
2source ~/.bash_profile
We should now have working vi commands in Readline! Check it out:

Vastly improved search
Vi commands in Readline
I hope you learned something from this article – there's lots more you can configure in readline that I did not cover here! Check out the full documentation here